Tmux on Windows
I do a lot of work on the command line in Linux and Windows. One of my favorite apps that makes working on the command line more efficient is Tmux. There hasn’t been anything quite like it in Windows, until now.
The Windows Subsystem for Linux (WSL) changes all of this.
Here are the steps for installing the WSL on Windows, and installing Tmux.
Step 1: Install WSL
If you haven’t already done so, install the Windows Subsystem for Linux (WSL).
Enable-WindowsOptionalFeature -Online -FeatureName Microsoft-Windows-Subsystem-Linux
# Will likely require and prompt for a reboot
# If you want to upgrade to WSL2, do not reboot yet, otherwise reboot now
NOTE: If you are on Windows 2004 or later, you should install WSL 2 for better performance / supportability.
Second NOTE: If you are running this on a VM like VirtualBox, you will need to use WSL 1
Step 2 (Optional): Upgrade to WSL2
Enable the ‘Virtual Machine Platform’ Windows feature.
Enable-WindowsOptionalFeature -Online -FeatureName VirtualMachinePlatform
# Will likely require and prompt for a reboot
# Go ahead and reboot
Set WSL2 as the default WSL version
wsl --set-default-version 2
# Will likely require updating the kernel, Visit https://aka.ms/wsl2kernel
# Install the new kernel and reboot if needed
Step 3: Install a Linux distro from the Windows store
In the Windows store, you can search for your preferred Linux distribution. Not all are available, but I have successfully used Ubuntu, Debian, and Kali Linux.
Step 4 (Optional): Install Windows Terminal from the Windows store.
Since you are in the Windows Store, I would recommend installing the Windows Terminal.
Step 5: Launch the Linux distro application to complete the installation
Run the application you installed from the Windows store; it should be available on the start menu once it is installed.
Complete the initial user setup:

Step 6 (Optional): Run the Linux Shell in the Windows Terminal
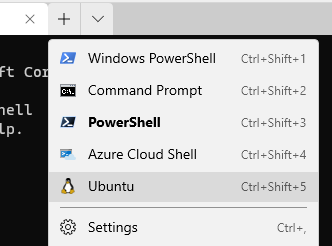
If you launch the Windows Terminal now, in the drop-down menu you should now have an option to select your Linux distro

If you want to set this as your default shell in the Windows Terminal,
you can update the settings Ctrl + , to do so.
Replace the GUID in defaultProfile with the one for your Linux app.
You can find the GUID in the list section under profiles.
You should see something like this:
    [
        "guid": "{2c4de342-38b7-51cf-b940-2309a097f518}",
        "hidden": false,
        "name": "Ubuntu",
        "source": "Windows.Terminal.Wsl"
    ]
Set this GUID as the defaultProfile,
and this will be the shell that opens by default.
Step 6: Install tmux
Open up the Linux distro app (or launch it from the Windows Terminal if you have it installed). Update / upgrade the applications using the package manager
For Ubuntu / Debian / Kali Linux
sudo apt update
sudo apt upgrade -y

# If using Ubuntu, Tmux should be installed already
sudo apt install tmux
Step 7: Launch
tmux
If you are just getting started with Tmux, search for Tmux Cheatsheet for useful examples

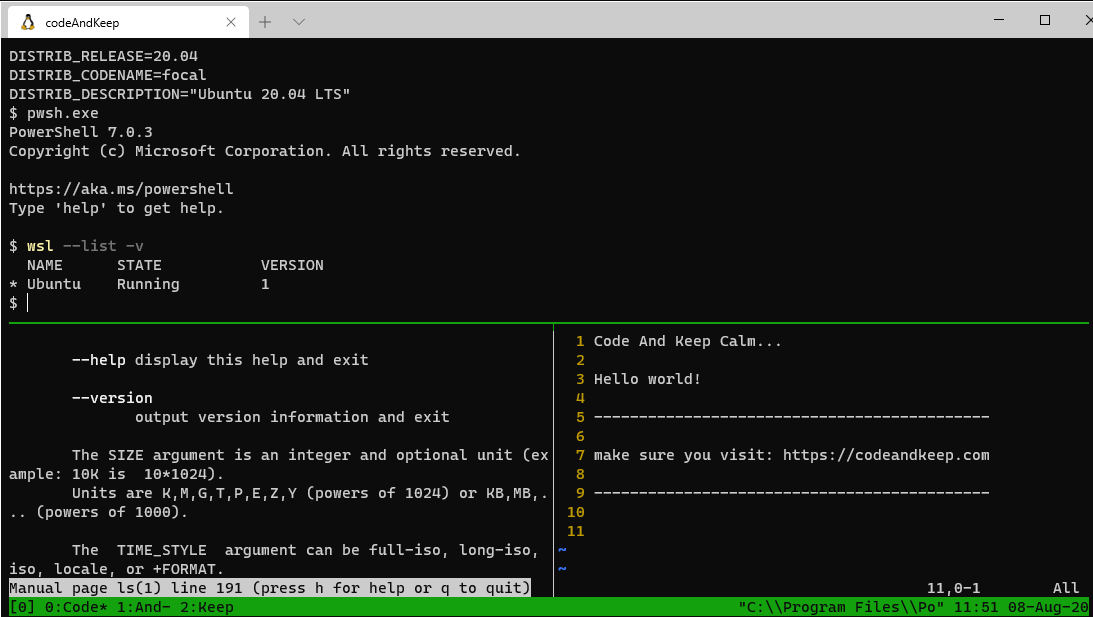
Now you can multiplex your terminals til the cows come home.
Post: Customizing Tmux with VIM keys
Thanks for reading
PS> exit
