OpenWrt on Virtual Box
I am a big fan of OpenWRT. I have made a post in the past about creating an OpenWRT VM on Hyper-V. Today I will go through automating the same VM creation on Virtual Box.
Overview
The OpenWRT VM creation on Virtual Box is much simpler than the setup on Hyper-V.
The entire process can be automated, and I have created a Git repository containing the code to do it. The repository contains both PowerShell and Bash scripts for the VM creation. (Should work on both Windows and Linux platforms)
Feel free to get the source code from GitHub, or stick around to go through the journey of getting this automated.
I will not go over the process for installing Virtual Box, and this post assumes it is already installed on your system.
The Journey
The biggest complication with installing OpenWRT on a VM, is getting the OS onto a virtual hard disk drive.
The OS is provided in the form of an IMG file, which actually presents a great opportunity for automating the creation of a VDI file directly from the IMG file.
Getting OpenWRT
OpenWRT has a convenient releases page with all supported versions / platforms here.
The latest version, at the time of writing, is 19.07.4. I will use the target for 64 bit x86 CPUs.
We can download the required file directly using curl like so:
version='19.07.4'
file_name="openwrt-$version-x86-64-combined-ext4.img.gz"
uri="https://downloads.openwrt.org/releases/$version/targets/x86/64/$file_name"
curl $uri -o "$HOME/Downloads/$file_name"
Using PowerShell:
$version = '19.07.4'
$fileName = "openwrt-$version-x86-64-combined-ext4.img.gz"
$uri = "https://downloads.openwrt.org/releases/$version/targets/x86/64/$fileName"
Invoke-WebRequest -Uri $uri -OutFile "$HOME/Downloads/$fileName"
You should now have a Gzipped file in your ‘Downloads’ folder, containing the OpenWrt IMG file.
Extract the IMG file
In bash this is simple:
gzip -dfk "$HOME/Downloads/$file_name"
In PowerShell, if you are on Linux, the same command will work. On Windows, there is no built-in tool / function that can do this. I have written a function however that can do this. It is in the same repository as the source code for this task, (here).
You can copy this function into your session and run it like so:
Expand-GzipArchive -Path $HOME/Downloads/$fileName `
  -Destination "$HOME/Downloads/openwrt-$version.img"
Alternatively, there are 3rd party tools, like 7zip, that can do this:
7z.exe x "$HOME/Downloads/$fileName" -o"$HOME/Downloads/"
Create the boot disk
This was the difficult step for the Hyper-V install,
but the vboxmanage command can directly convert an IMG file to a VDI.
On Linux you should be able to run this command directly without any issues. If you are on Windows, you likely need to do some prep work.
Skip the following small section if you are on Linux.
Windows vboxmanage setup:
You can either:
- Add the directory containing the
vboxmanage.exeto your PATH environment variable, - Create a PowerShell alias pointing to this file
Option 1: Add Path directory
# Assuming the default install location for Virtual Box
$env:Path += ";$env:PROGRAMFILES\Oracle\VirtualBox"
Option 2: PowerShell alias
# Assuming the default install location for Virtual Box
Set-Alias -Name vboxmanage -Value "$env:PROGRAMFILES\Oracle\VirtualBox\vboxmanage.exe"
Now that you have vboxmanage ready and working, we can create the VDI boot disk:
In Bash:
# Change variables as desired
img_path="$HOME/Downloads/openwrt-$version.img"

vm_name='wrt'
vm_root="$HOME/vm"
vm_path="$vm_root/$vm_name"
vdi_path="$vm_path/$vm_name.vdi"

# Create directory that will contain the VM files
mkdir -p $vm_path

vboxmanage convertfromraw --format VDI $img_path $vdi_path
# Register the VDI in virtual box and increase to a reasonable size
vboxmanage modifymedium $vdi_path --resize 512
In PowerShell:
# Change variables as desired
$imgPath = "$HOME/Downloads/openwrt-$version.img"

$vmName = 'wrt'
$vmRoot = Join-Path -Path $HOME -Childpath 'vm'
$vmPath = Join-Path -Path $vmRoot -ChildPath $vmName
$vdiPath = Join-Path -Path $vmPath -ChildPath "$vmName.vdi"

# Create directory that will contain the VM files
New-Item -ItemType Directory -Path $vmPath -Force > $null

vboxmanage convertfromraw --format VDI $imgPath $vdiPath
# Register the VDI in virtual box and increase to a reasonable size
vboxmanage modifymedium $vdiPath --resize 512
Now that we have a boot disk ready to go, we can create the VM.
Create the VM
Bash:
os_type='Linux_x64'

vboxmanage createvm --name $vm_name \
  --ostype $os_type \
  --basefolder $vm_root \
  --register
PowerShell:
$osType = 'Linux_x64'

vboxmanage createvm --name $vmName `
    --ostype $osType `
    --basefolder $vmRoot `
    --register
Add the disk
Bash:
vboxmanage storagectl $vm_name --name 'IDE' --add ide
vboxmanage storageattach $vm_name \
  --storagectl 'IDE' \
  --port 0 \
  --device 0 \
  --type hdd \
  --medium $vdi_path
PowerShell:
    vboxmanage storagectl $vmName --name 'IDE' --add ide
    vboxmanage storageattach $vmName `
      --storagectl 'IDE' `
      --port 0 `
      --device 0 `
      --type hdd `
      --medium $vdiPath
VM Network configuration
Briefly, the network configuration on this VM will involve 3 different Virtual Box network adapters:
- Internal
- NAT
- Host-only
More details to follow as to why this is the network design.
Bash:
# Get the name of the first listed Host-only netadapter
host_if=$(vboxmanage list hostonlyifs |
  grep -E "^Name:\s.+" -m 1 |
      awk '{ print $2 }')
vboxmanage modifyvm $vm_name --nic1 intnet --intnet1 'internal0'
vboxmanage modifyvm $vm_name --nic2 nat
vboxmanage modifyvm $vm_name --nic3 hostonly --hostonlyadapter3 $host_if
PowerShell:
# Get the name of the first listed Host-only netadapter
$hostIf = vboxmanage list hostonlyifs |
  Where-Object {$_ -like 'Name: *'} |
    Select-Object -First 1
$hostIfName = $hostIf.Substring(5, ($hostIf.Length - 5)).Trim()

vboxmanage modifyvm $vmName --nic1 intnet --intnet1 'internal0'
vboxmanage modifyvm $vmName --nic2 nat
vboxmanage modifyvm $vmName --nic3 hostonly --hostonlyadapter3 $hostIfName
Network configuration overview
Using a NAT network adapter instead of a bridged network adapter, ensures that the VM is not available on the same network as the host. This means that the built-in DHCP server won’t affect the host network.
This configuration does mean that the VM is isolated to the host. If you plan on having multiple host machines with VMs connected together, you would want to use a bridged adapter.
Final VM configurations
Lastly, we can tune the VM resources.
Bash:
# Modify system / general settings
vboxmanage modifyvm $vm_name --cpus 1 --memory 256 --vram 12
vboxmanage modifyvm $vm_name --boot1 disk
vboxmanage modifyvm $vm_name --audio none
PowerShell:
# Modify system / general settings
vboxmanage modifyvm $vmName --cpus 1 --memory 256 --vram 12
vboxmanage modifyvm $vmName --boot1 disk
vboxmanage modifyvm $vmName --audio none
Start the VM
Bash:
vboxmanage startvm $vm_name
PowerShell:
vboxmanage startvm $vmName
You should be met with a screen looking like this:
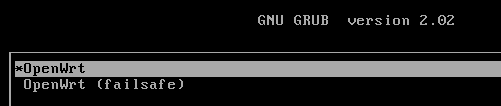
Once the system has finished booting (the rolling text has stopped),
press Enter and you will see you are automatically logged in as root.
It will mention the lack of password for root,
which can be immediately addressed running passwd and setting one up.
Configure OpenWrt
Most of the configuration is automatically done by default. You should already be able to reach the internet since the internal network adapter and the NAT network adapter should be bridged.
# Show bridged interface
ip link show br-lan

# Show bridged IP address
ip addr show br-lan
If you followed the same network configuration, there will be 3 network interfaces. The 3rd of which, will not be configured by default. This is the Host-only network adapter.
# Show eth2 config (should be DOWN)
ip link show eth2
To enable this network adapter:
# Create 'mgmt' interface for eth2
uci set network.mgmt=interface
uci set network.mgmt.ifname='eth2'
uci set network.mgmt.proto='dhcp'

# Review uci changes
uci changes

# Apply configuration changes
uci commit

# Reload network
/etc/init.d/network restart

# Show eth2 interface & IP address
ip addr show eth2
At this point, you should be able to connect to the IP address listed from the command above over HTTP or SSH on the host machine.
You may also want to change the IP addresses used for the LAN interface:
uci set network.lan.ipaddr='10.0.0.1'
uci commit

/etc/init.d/network restart

# Show new IP addresses
ip a show br-lan
Now when you create new VMs in VirtualBox, you can set configure them to use the same internal network adapter as this VM. They should automatically get an IP address, and be able to access the internet without having a NAT or Bridged network interface.
Thanks for reading
PS> exit