Build a VM from a Template
Creating VMs from a base image can make your life a lot easier. Not having to sit through and select the same options during an OS install is a big time save.
A lot of work can go into creating a base image, but it doesn’t have to. I will briefly touch on how to create a base Windows image and then get into the automation of creating a Hyper-V VM from that template.
In my last post , I showed a simple way of creating a VM using only PowerShell.
I would recommend looking at that post first and testing it out to ensure you know the basics of PowerShell and Hyper-V.
To start, build a VM with the Windows OS that you wish to use (I will be using Server 2016 core). The process should be the same for Windows 7/Server 2008 and up.
Once it is up and running make whatever configurations that you want to be applied to all machines that you will be using this operating system on.
I have installed VIM for Windows and applied the latest Windows Updates, that’s it.
When all that configuration is complete, open up PowerShell and navigate to the ‘Sysprep’ folder (generally here C:\Windows\System32\Sysprep).
cd $ENV:SystemRoot\System32\Sysprep
In this directory you will find a folder called ‘Panther’, which can be used when applying an AutoUnattend.xml file for additional configuration. More importantly, is the ‘sysprep.exe’ executable.
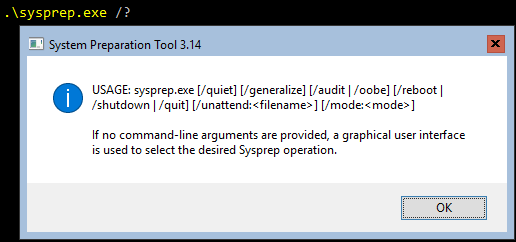
For this use case the switches I will be using are:
- Generalize - Allows this image to be applied to more then just this machine
- Oobe - Out of Box Experience: The alternative is Audit Mode, but that’s not necessary for my use case
- Mode:VM - This switch makes the first boot faster by skipping some hardware detection *
- Shutdown - I want to use this sysprep’d image for other VMs, so I don’t want to restart and customize more
*NOTE: This option is only supported on Win8/Server 2012 and up. It should not be used if you want to use this image on a physical device, or use this image on another hypervisor.
.\sysprep.exe /generalize /oobe /mode:vm /shutdown
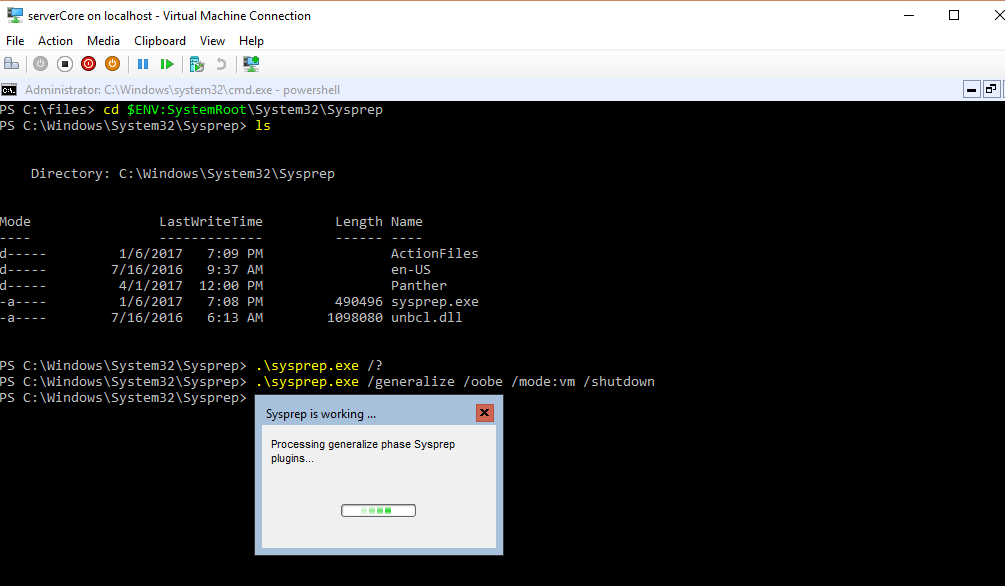
The VM will shutdown after successfully completing the sysprep process.
Using the Image
First things first, you should remove the vm from Hyper-V, just keep the VHDX file. You should know where this file is located. In my case it is V:\VMs\serverCore\serverCore.vhdx. You can find the file location using the following steps:
$vmName='serverCore'
Get-VMHardDiskDrive -VMName $vmName | Select -expand Path
As long as you only have 1 vhd file for that vm, this will tell you your path.
I have created a Templates folder (V:\Templates) to keep these template files for easy access.
$vmName='serverCore'
# Get VHD Path
$vhdPath=Get-VMHardDiskDrive -VMName $vmName | Select -expand Path

# Destination/new name of the template vhd file (change to your value)
$templatePath='V:\Templates\core2016.vhdx'

Remove-VM -VMName $vmName
Move-Item -Path $vhdPath -Destination $templatePath

# set the vhd file to ReadOnly so it doesn't get modified
Set-ItemProperty -Path $templatePath -Name isReadOnly -Value $true
Now we are ready to build a new virtual machine using this template.
Build from template
We can use a similar approach that we used in the previous post.
# make sure you update these variable to match your configuration
$templatePath="V:\Templates\core2016.vhdx"
$vmName='server1'
$vmPath="V:\VMs\$vmName"
$vhdPath="$vmPath\$vmName.vhdx"
$switchName='External vSwitch'
[int16]$generation=2
[int64]$memory=1Gb
[int16]$vCPU=2

[bool]$isDir=Test-Path -Path $vmPath
if(!$isDir){
  New-Item -Path $vmPath -Type Directory | Out-Null
}
Copy-Item -Path $templatePath -Destination $vhdPath -Verbose

Set-ItemProperty -Path $vhdPath -Name isReadOnly -Value $false
New-VM -VMName $vmName `
  -Path $vmPath `
  -VHDPath $vhdPath `
  -MemoryStartupBytes $memory `
  -SwitchName $switchName `
  -Generation $generation `
  -Verbose

Set-VM -VMName $vmName -ProcessorCount $vCPU
Start-VM -VMName $vmName
vmconnect.exe localhost $vmName
It’s important to note that the ‘generation’ of the VMs that you create from this template should match the generation of the original VM you used to make the template.
In a matter of minutes you should be booted into your new VM, and ready to login. If you are like me and need to build a lab quickly, this will save you loads of time in the future. This process is completely automated and doesn’t require you to select an option like it does during the original installation.
You can loop through this script using multiple/different vm names, take a coffee break, and come back to your batch of VMs fully installed and ready to go.
Additional Comments
It is relatively easy to add some error checking and turn this into a function to do the whole thing.
The Copy-Item will take a while to finish and unfortunately doesn’t provide an indication of progress. You could replace this with Robocopy for a more reliable copy of the vhd file.
There is no validation in the code used above. If the VM name is already taken, there will be errors and the VM will not build. In this case, it may start the VM and modify its processor count.
I did a quick comparison of the first boot of a machine sysprep’d with /mode:VM and without /mode:VM. They had the same VM configuration (cpu, memory, vmswitch), the same operating system, and ran on the same hypervisor (physical machine). No other VMs were running and the system had more than enough memory to quickly start the VM.
- Without /mode:vm - 3:19.50
- With /mode:vm - 1:50.23
- From DVD - 5:31.46 *
*After copy and install (time from boot after ‘Restart Now’ prompt to console being loaded)
This table sums up the time until the VM is successfully booted. The ‘Boot’ time illustrates the differences in sysprep modes (VM Mode/not VM Mode).
| VM Creation Mode | Total (mm:ss) | Boot (mm:ss) | Copy/Install (mm:ss) |
|---|---|---|---|
| DVD | 16:30 | 5:31 | 10:45 |
| Sysprep | 9:32 | 3:20 | 5:57 |
| Sysprep VM Mode | 6:06 | 1:50 | 4:03 |
The missing 12-15 seconds is the time it took to create/register the VM in Hyper-V on the host.
It should be noted that the image I used in the ‘Sysprep’ creation mode, was approximately 2Gb larger than the ‘Sysprep VM Mode’ image. This contributed to the longer copy time, but should not influence the difference in boot time. These values shouldn’t be taken too seriously as they were measured once and not from a large sample size.
The copy/install times will vary from machine to machine. My computer uses a consumer grade Western Digital Hard Drive (5400 rpm). Running this on SSDs are faster HDD will result in much faster copy times.
Thanks for reading
PS> exit